We're putting two of the best energy monitors up against each other, in a head to head battle to see which is the best.
In the red corner, we have the Loop Energy Saver. Despite being launched in 2013, the Loop is a real time energy tracker which works through your Wi-Fi connection. Monitoring is done via a smartphone or tablet app, or you can check in on your consumption via their website.
In the blue corner we have the Geo Minim. No Wi-Fi connection is required for this unit; it simply clips onto your electricity input and sends data to a remote screen. Monitoring can tell you about your financial consumption, CO2 emissions and Wattage.
Both are self-install units, and both claim to save money. They are not the same as smart meters; a smart meter is to help your energy company see what you've used. These devices are for you to see what you use and start making changes.
Let's battle it out and see which one comes out on top.
At a glance
| Loop | Geo Minim | |
|---|---|---|
| Cost | £69.99 | £37.95 |
| Functions | Budgeting, wattage, usage comparison, low usage calculation | Budgeting, CO2 calculations, wattage, temperature |
| Real time monitoring | Yes | Yes |
| Installation | DIY | DIY |
| Connectivity | Requires Wi-Fi | No Wi-Fi required |
| Historical tracking | Infinite | Up to two months |
| Monitoring | Via website or app | Using display unit |
Cost
Winner: Geo Minim
The Geo Minim+ costs £37.95 and claims it can save you around £50 a year by making you more aware of the energy you're using.
The Loop Energy Saver costs £69.99, and claims the average customer saves £250.
On simple initial outlay alone, the Geo Minim has to be the choice.
Presentation
Winner: Loop Energy Saver
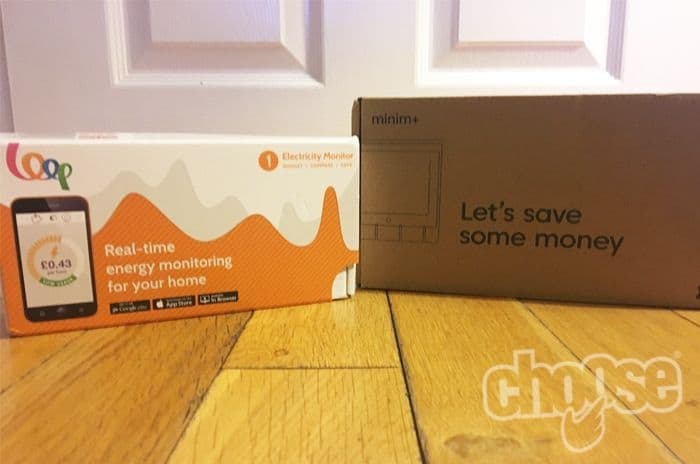
The Loop Energy Saver was beautifully presented, with a separate box for each of the gas and electricity monitors.
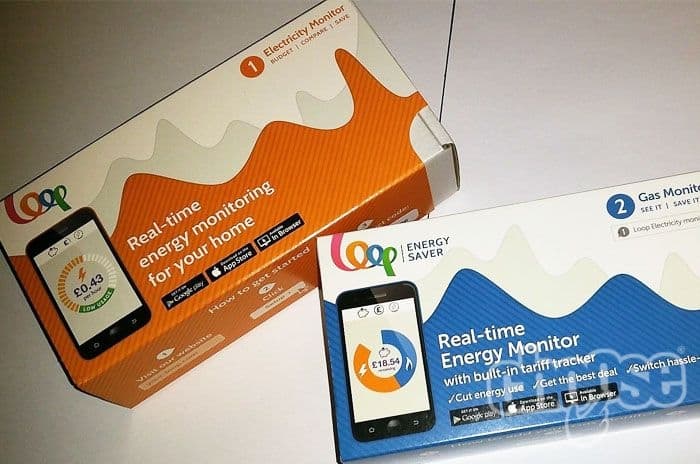
The Loop Energy Saver packaging.
Opening the packaging felt a little like unboxing a smartphone. It was all very luxurious and well designed. The first thing you see when you get into the package is the little energy monitor itself. Once unpacked, there were quite a few components to figure out.
Unnervingly, there were no instructions in the box. No leaflet or 'quick start' guide, which is great for saving paper but not the best if you're the sort of person who prefers to read first.
However, setup was actually super easy via the website, as we'll explain next.

The Geo Minim+ packaging.
The Geo Minim+ was packaged in a much plainer fashion. The box was plain cardboard, which, from a recycling point of view, was probably more environmentally friendly. However, the whole thing felt a lot less luxurious than the Loop.
Opening the box, the energy monitor proudly presented itself front and centre. And, hooray, there were paper instructions on how to use it too.
Delving further into the box revealed a lot of wires and a large plastic blob, which we later found out was the transmitter unit.
Although the energy display unit itself is nicely designed and not too big or obtrusive, the rest of the components seemed rather cheap and nasty next to the elegant design of the Loop.
Because the products were so beautifully designed and packaged, we felt like the Loop was a cut above the Minim before we'd even plugged it in. We've picked it as our winner for this section.
Set up
Winner: Geo Minim
These two energy monitors work quite differently. Loop is a connected device, working via Wi-Fi to display readings. The Geo Minim, on the other hand, sends a signal between the transmitter and the display unit, with no Wi-Fi involved.
As such, the set up for the Loop was slightly more complex than with the Minim. However, thanks to a very cleverly designed and user friendly website, it was much easier than it first appeared.
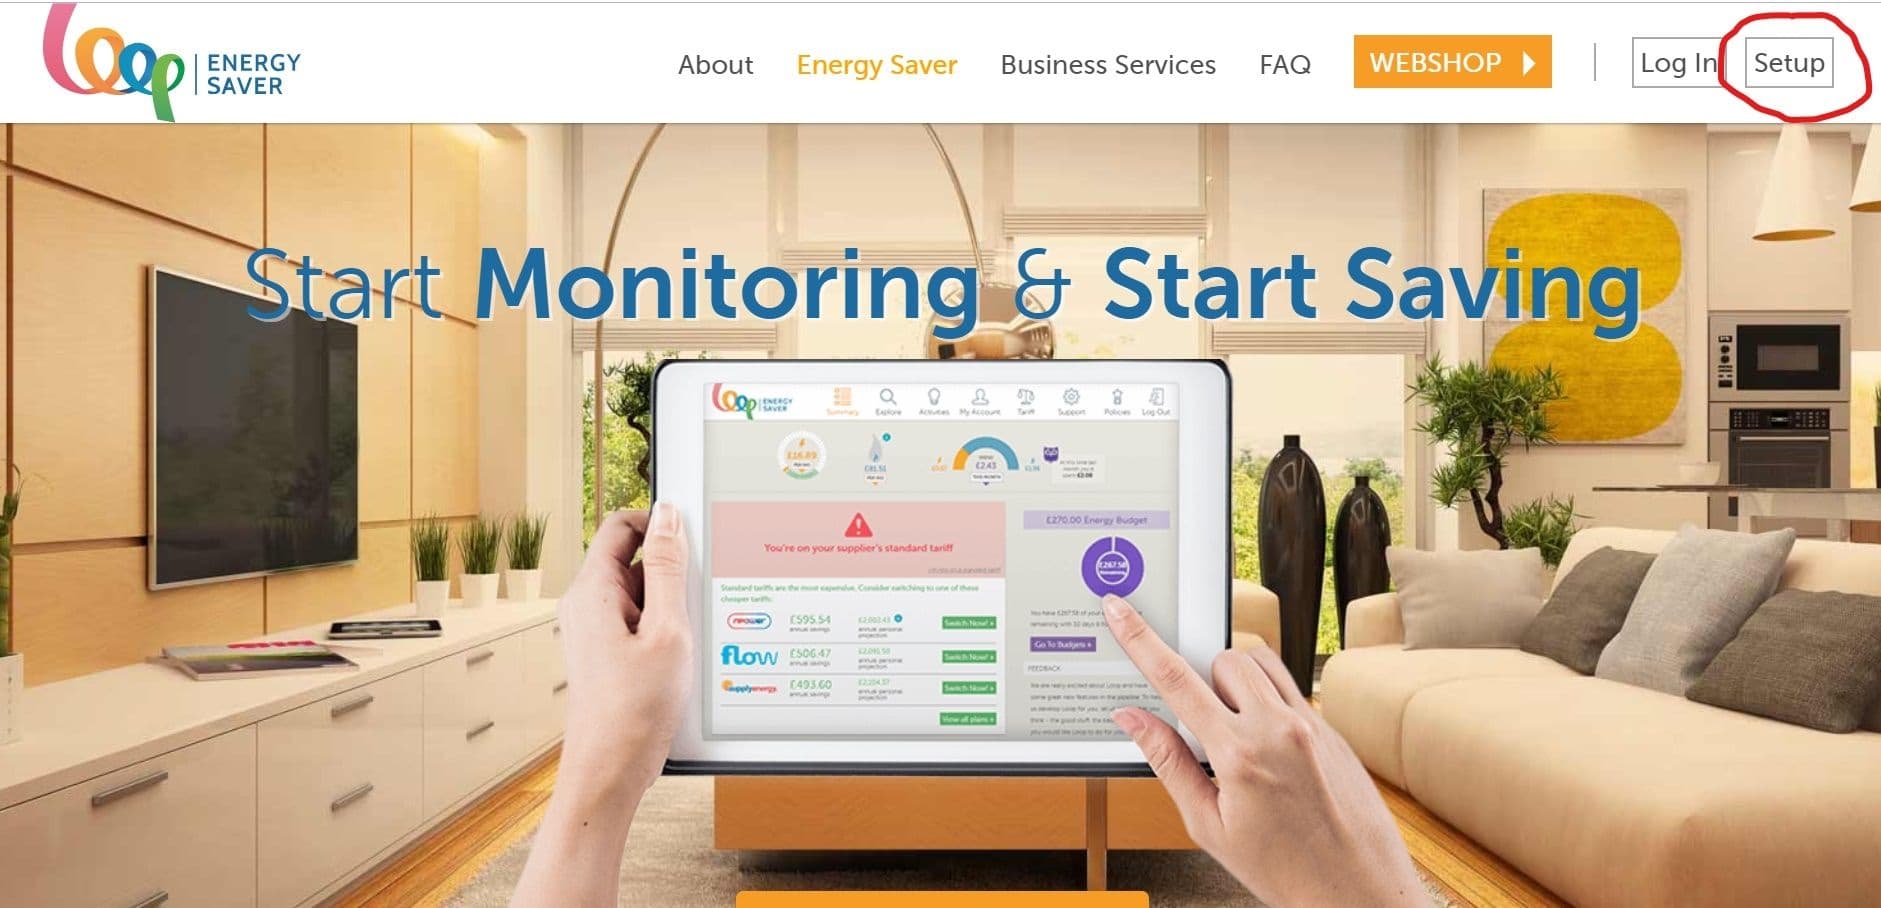
Setup on the Loop website
The box directed us to the homepage, where there was a clear 'setup' button in the top right of the screen. After furnishing us with some safety information regarding tampering with electricity, we could get on with installing our energy monitor.
The website promised to have us up and running within 10 minutes, and they weren't wrong. A step-by-step wizard guided us through the process. The first thing to do was to set up the sender unit.
We liked the inventive plug it came with which required self-assembly but took up much less space in the box.
The on screen instructions advised how to connect the receiver to the back of our router, and then to the power outlet.
Next it was time to connect the transmitter. The images on the website made it super easy to understand where to connect it at the meter box, and in no time at all we'd got everything set up.

Loop setup images.
With everything where it should be, the Loop website could test the connection between the transmitter and receiver. We were informed it was successful and the unit started monitoring our energy consumption immediately.
Without doubt the most time consuming and fiddly part of the installation was the registration of the device and filling in the information about our home. Registering devices required the location of a tiny code printed on the side of the transmitter, which was a bit of a pain to read but not a big deal.
Although the Loop started sending electricity readings to us right away, they wouldn't be accurate until we'd input information about our tariff and home. Thankfully they seem to have all the tariff information online, so all we needed to do was put in the name of our plan and Loop did the rest.
This was particularly useful as our home was on a fixed tariff with a complex arrangement for standing charges, making it difficult to calculate the real cost per kWh.
The final part of the setup was to install the Loop app on our smartphone. It was simple enough to do, using the same username and password as we'd set up for the website, and immediately we started seeing real time energy readings in the app too.
Installing the Minim was a much simpler affair. A step by step 'quick start' guide came in the box, which talked us through all the necessary actions to get it up and running.
The basic process involved clipping the sensor to the correct wire in our meter cupboard. Then we needed to turn on the transmitter unit and ensure there was a red flashing LED. This unit is battery powered, but there is a battery monitor on the screen of the display unit to let you know if it's getting low.
With everything installed at the meter end, all that remained was to plug in the display unit and get it set up. Turning it on was a simple matter of plugging it in and switching it on, and the unit immediately started to show data regarding energy consumption in our home.
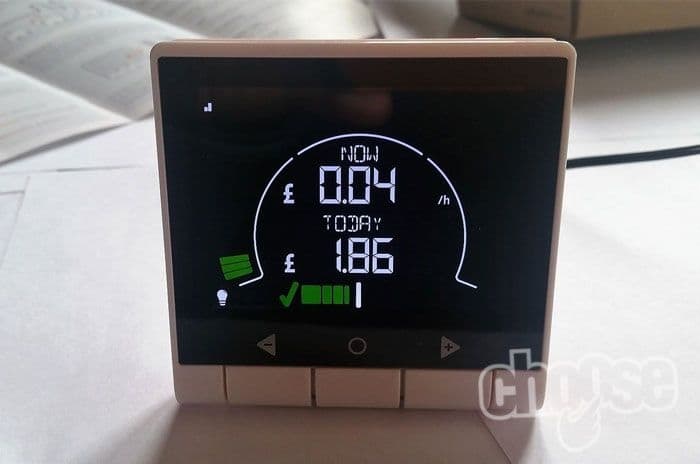
The Geo Minim monitor.
Getting it set up to our particular home was a little more complex. We needed to set the time and date, as well as our budget and tariff. This is done by pressing and holding the middle button, then scrolling through the options and using the other buttons to change values.
Although we knew the unit rate of our tariff, there were also daily standing charges to take into account. Thankfully our provider publishes a TCR (tariff comparison rate) on our bills, so we just used that as our rate.
Although both units were relatively straightforward to set up thanks to the comprehensive instructions provided by the manufacturers, the process for the Minim was significantly faster as there was no website to interact with. For this reason, we've chosen it as our winner for this section.
Functions
Winner: Loop Energy Saver
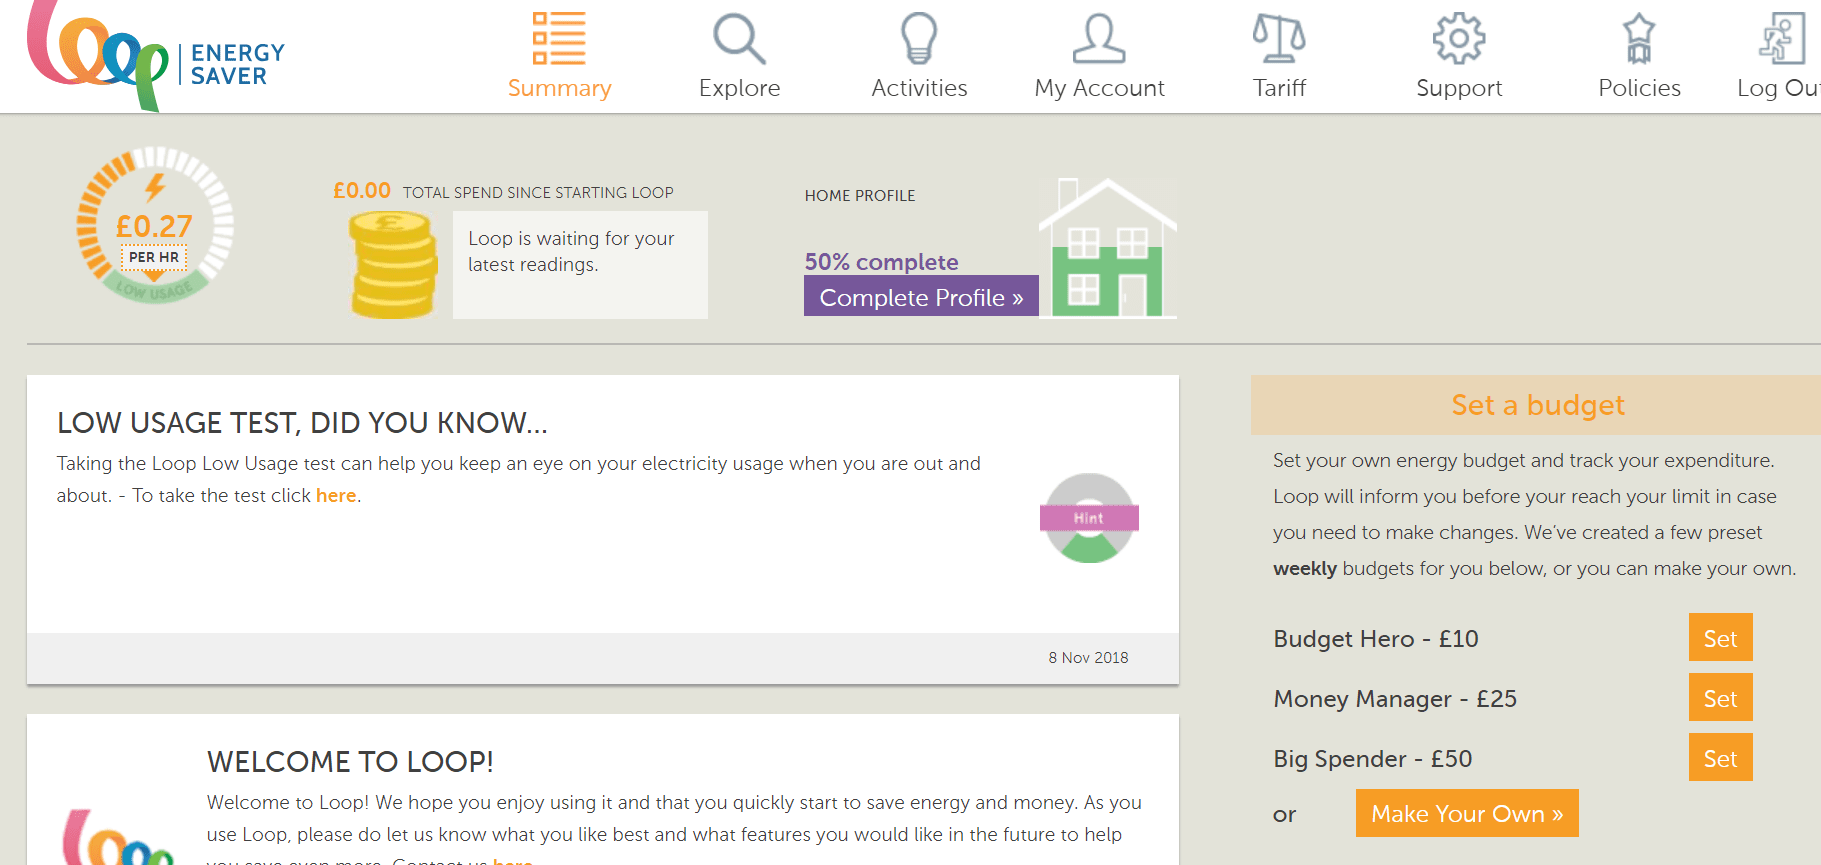
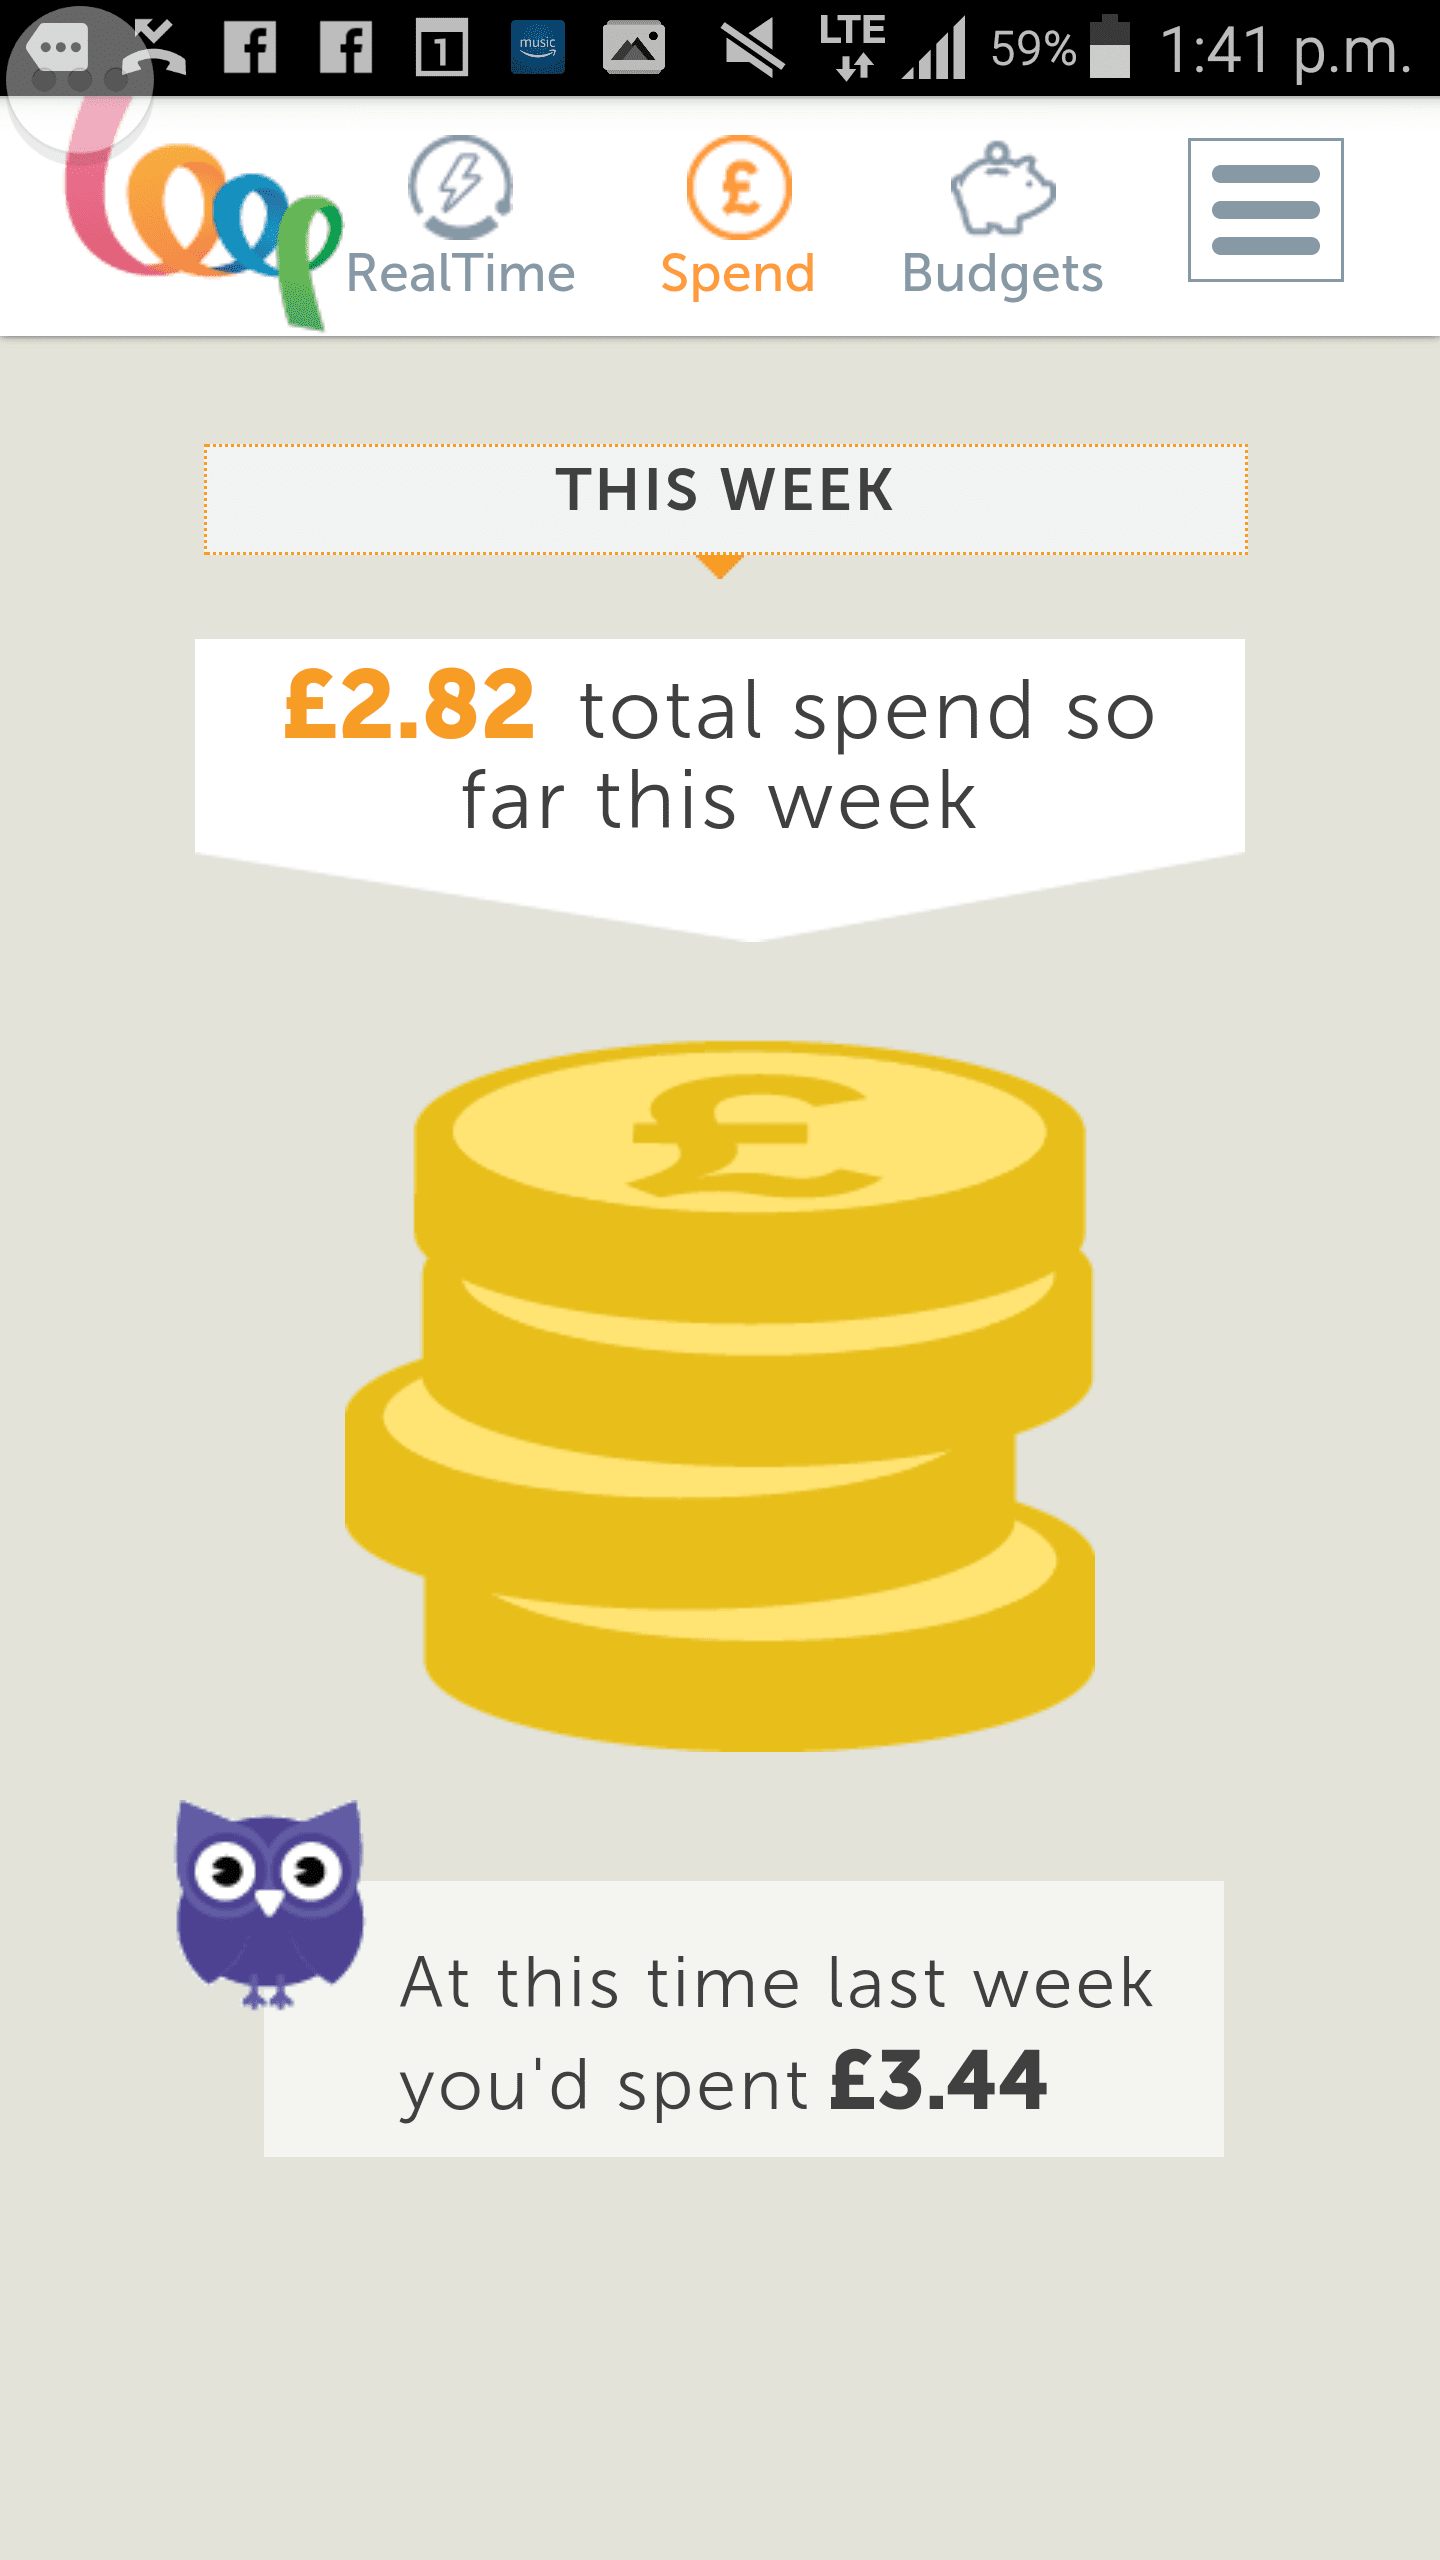
The Loop website.
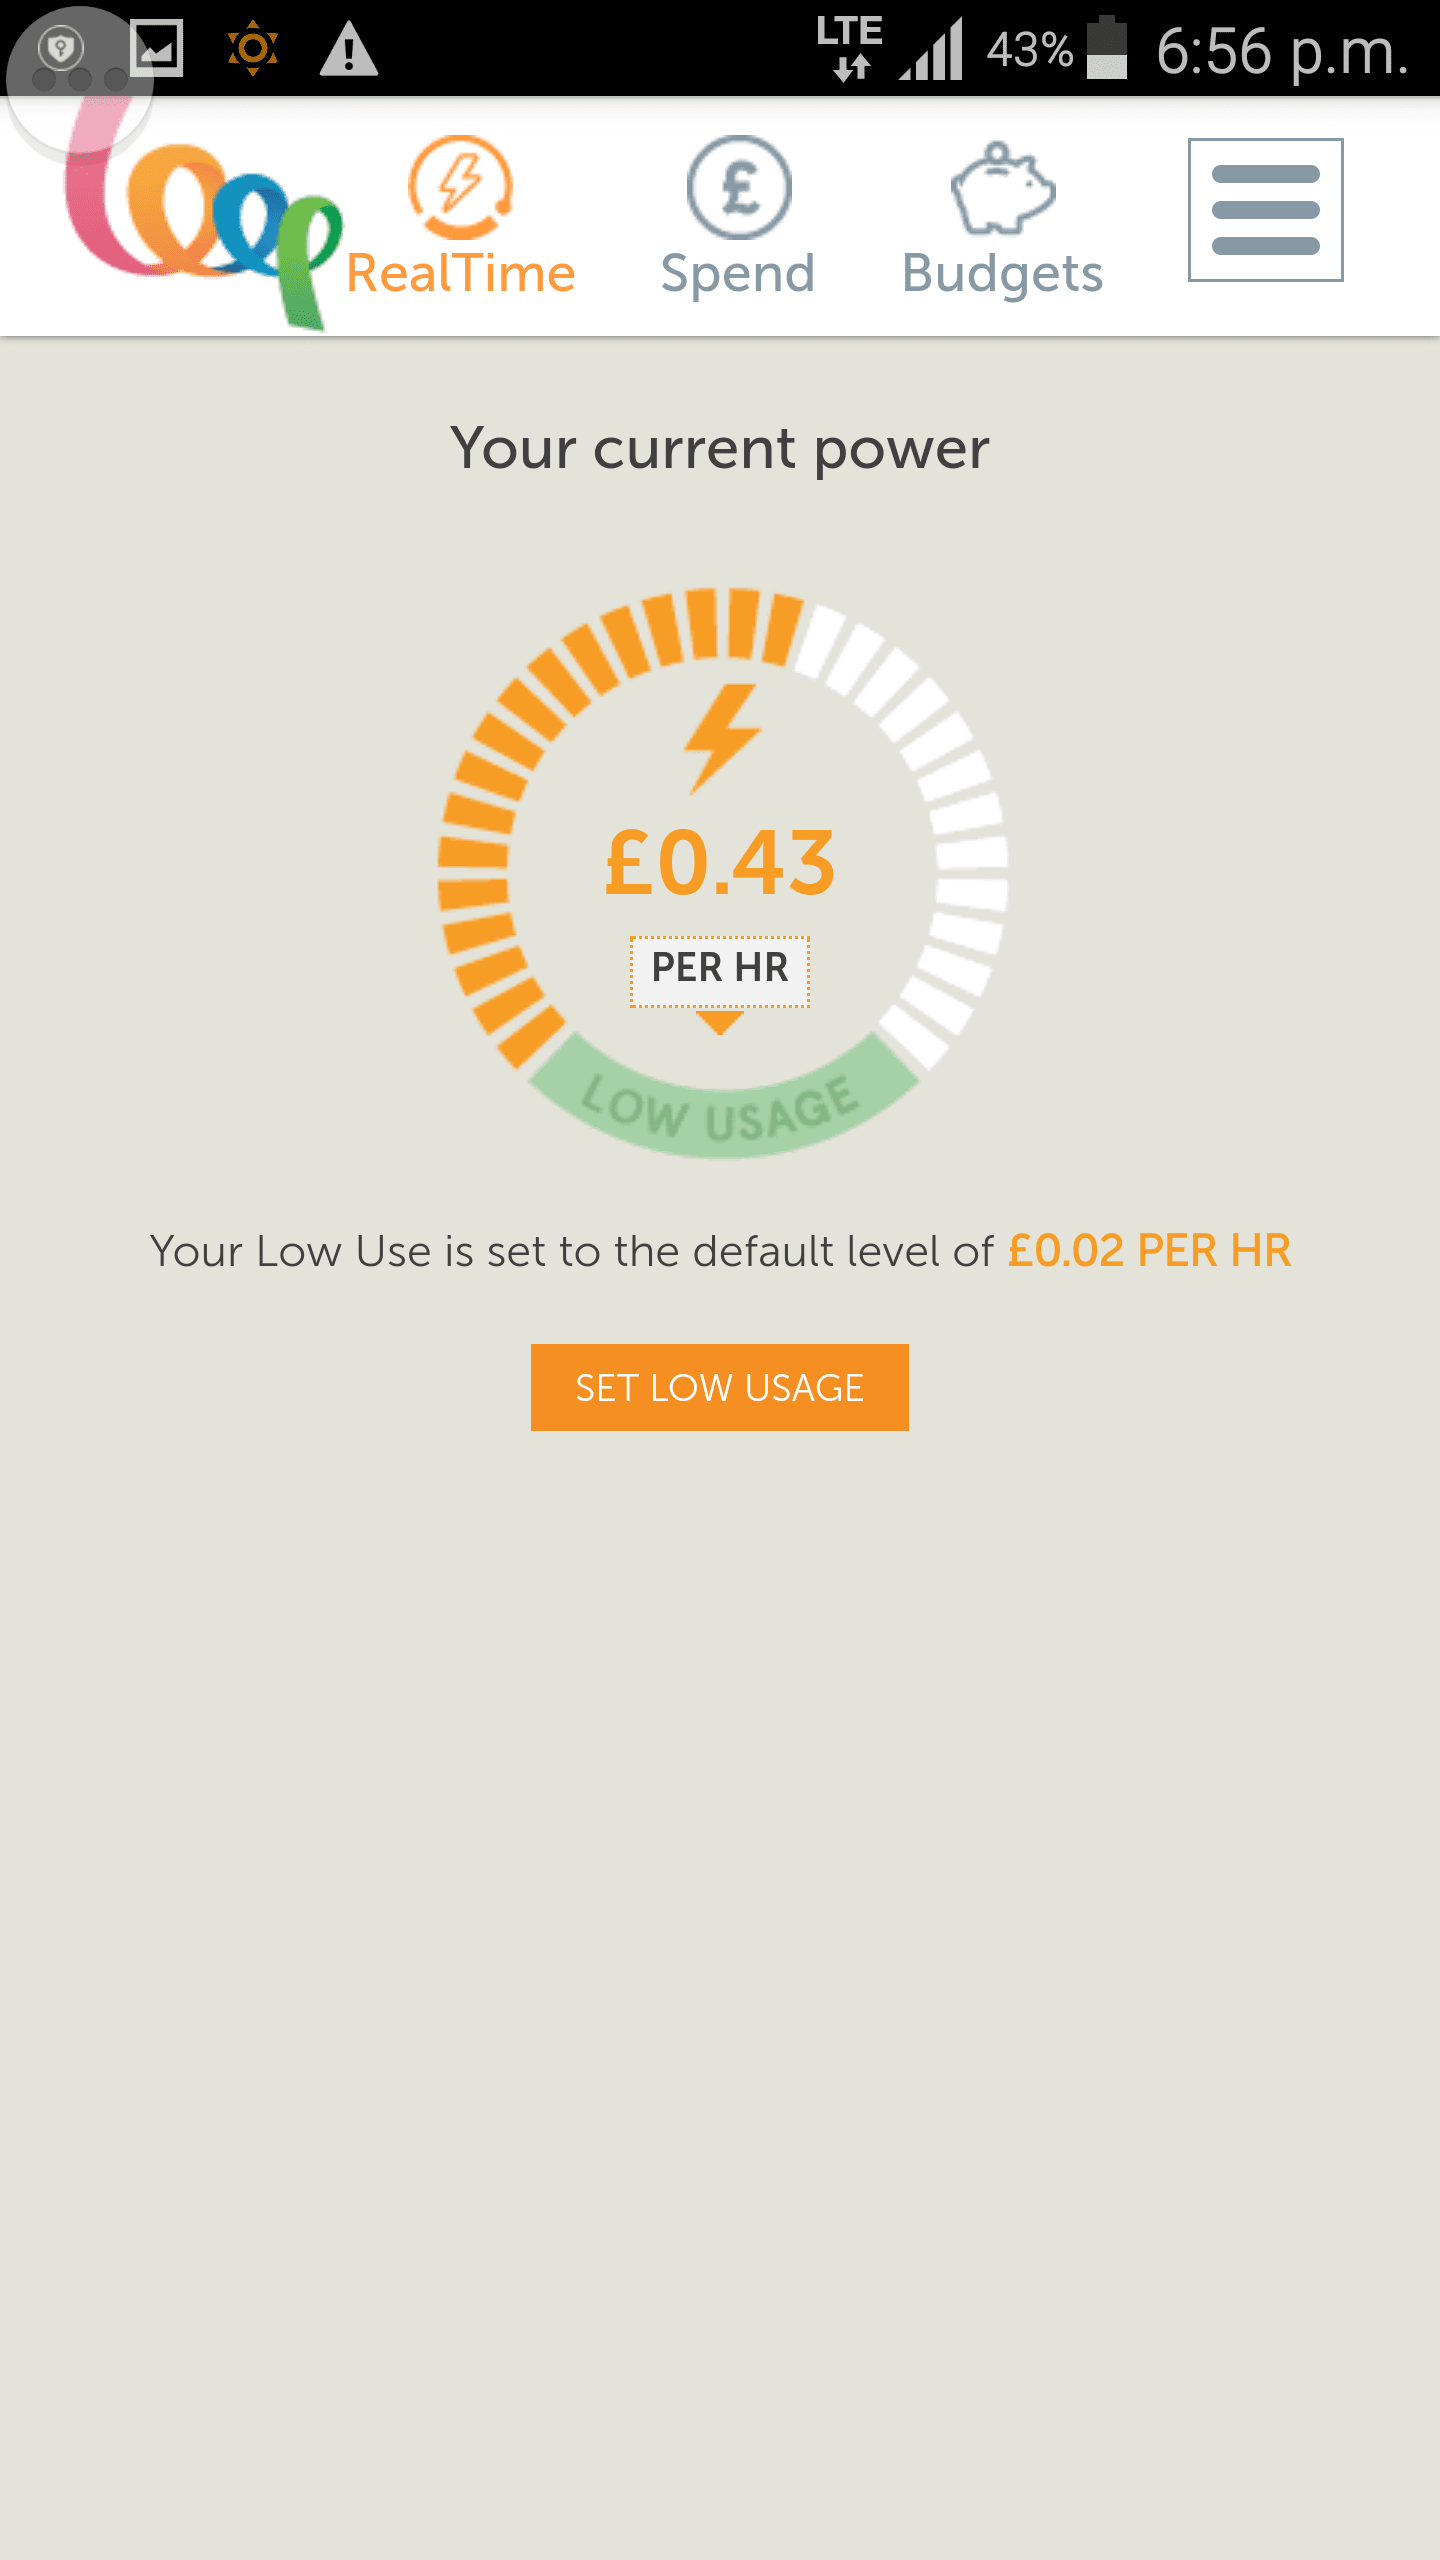
The Loop website is a great way to view your real time usage, as well as perform a number of other functions. On the homepage, you can see right away how much you're spending per hour right now, as well as how much you've spent since you started using the Loop. As well as this you can:
- See your real time consumption in other formats: Loop can display your consumption in money or kWh, and can extrapolate your current usage to a daily, weekly, monthly or annual cost.
- Set a budget: Loop suggests a weekly budget level for you, or you can set your own custom amount right on the homepage.
- Run a low usage test: By switching everything that you can off, Loop can set a low usage level for your home. This is particularly useful if you're out for the day and want to check if something has been left switched on.
- See your consumption as a graph: This is actually really interesting, and you can easily see the days when you did things like laundry or lots of cooking.
- Compare your use: You can compare your usage to other people like you, or even to yourself to see how well your energy saving is progressing.
- Learn: There are loads of resources on the website for learning about energy saving too, from finding out about running costs of different appliances to understanding terminology like 'kWh' and 'CO2'.
The Geo Minim doesn't have a supporting website, so everything is displayed on the device itself. It takes a little getting used to, but once you're accustomed to where to find the information you need, it's pretty easy to understand. Functions include:
- Budget: You can set a daily budget on the device, and then read off the screen how close or over your budget you are. The budget bar at the bottom travels from green to red as you approach and then exceed your budget.
- Consumption: You can view real time consumption both in cash, in Watts and in CO2.
- Compare consumption: Scrolling through each of these displays will show you your consumption in whichever measurement you're looking at for last month, this month, last week, this week, yesterday and today.
- Use your speedometer: Around the outside of the display, a 'speedometer' shows your consumption in kW graphically.
- Check the temperature: In the top right, you can see the temperature of the room in which the display unit is placed.
Although both devices have a fair few functions built in, the Loop simply does more, and does it better than the Minim.
Energy Saving
Winner: Loop Energy Saver
The feedback we got from the Loop was amazing, and really spurred us on to make changes. Clicking through the website we found sections where we could compare our use with other people's use, as well as comparing against ourselves to see whether we'd done better this week than last week.
Loop usage on the website.
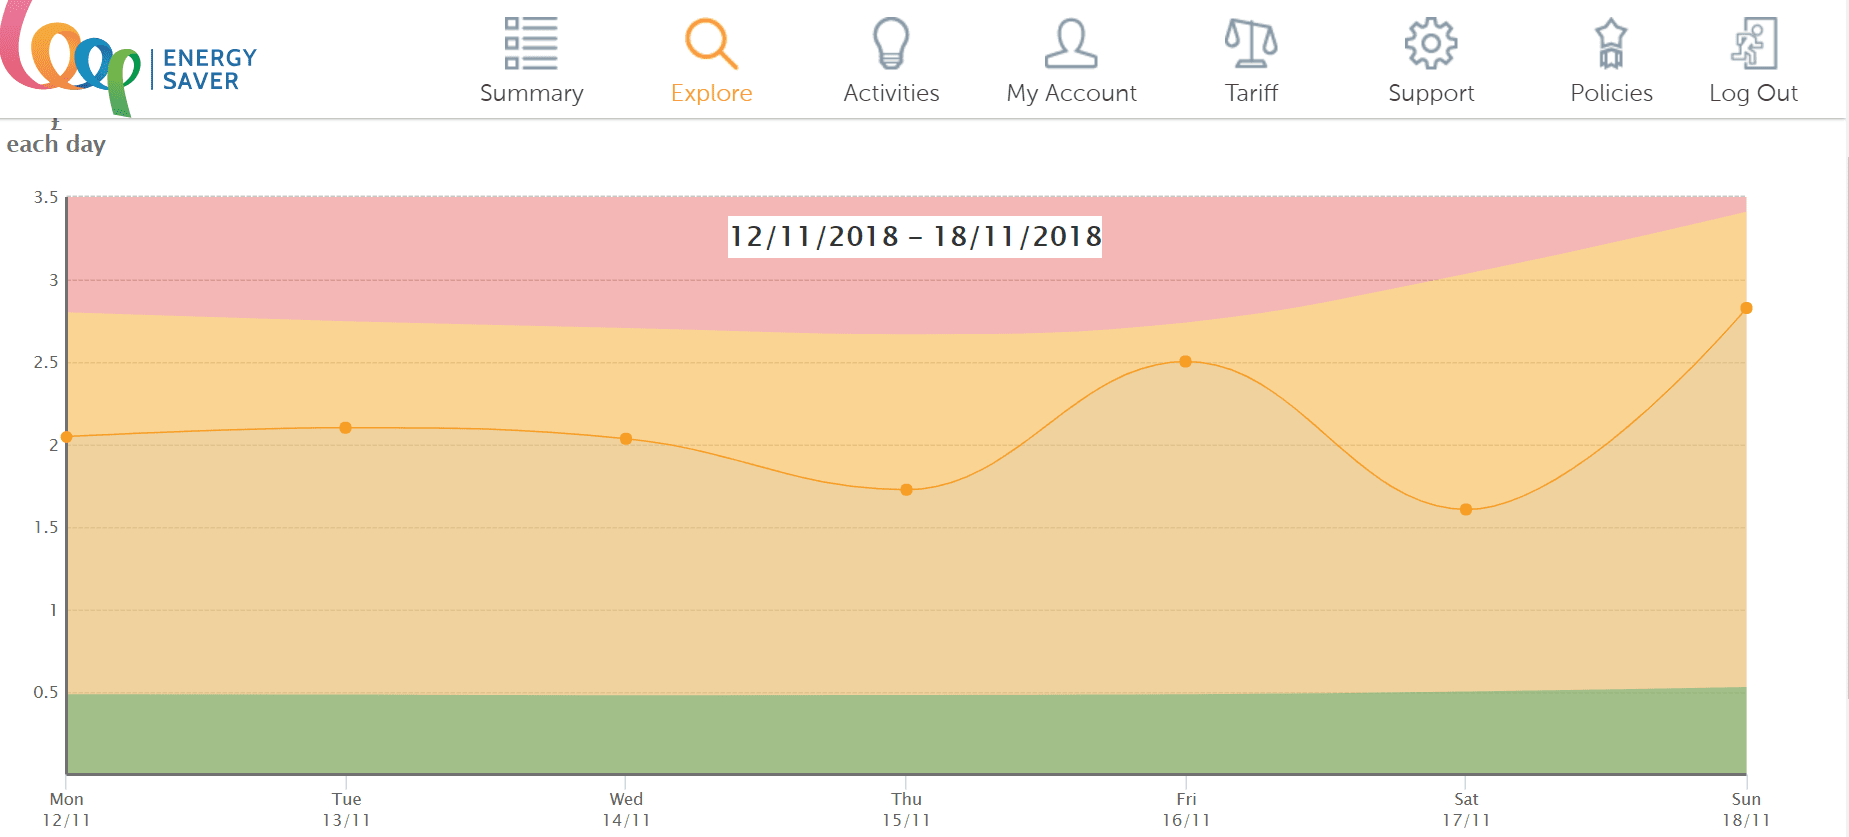
You could also see a graph of any time period to identify times when you were using the most amount of energy; a simple way to spot those electricity guzzlers in your home.
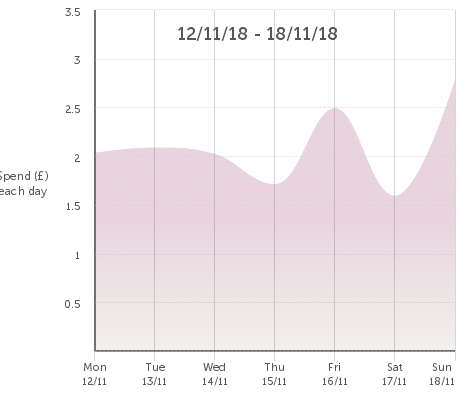
Loop usage graph.
As well as the feedback from the Loop itself, there is a lot of useful information on the website regarding ways to reduce energy consumption. Then, of course, there's the Loop app. Available for Android and iOS, it's a really handy little app which means you can always check how your energy consumption is going.
Looking at it becomes almost addictive, especially when you know the house is empty and you see the reading hop up (there goes the fridge again). The one thing Loop doesn't do that Minim does is calculate CO2 emissions; it would be nice to see this added to the app and website.
The Geo Minim makes it easy to see at a glance what your using and whether you're on track. Trying to keep the budget bar in the green was fairly motivating, but somehow it felt almost demotivating when it was already red by lunchtime because we'd done a wash or cooked a roast.
The 'speedometer' is a nice idea, but we struggled to ever get it into the red, even when all the lights were on and various appliances were going. It would be nice to be able to tailor this to our own 'low usage' level, rather than what the manufacturer thinks it should be.
What was excellent with the Minim was the supporting information which challenged you to cut your consumption by £50. There was a lot of useful advice in the enclosed guide, and a place where you could record your energy use and make efforts to drive it down.
We've also come up with some great ideas for saving money on your energy bill. Have a look at our top tips here and see what you can save.
The biggest downside to the Geo Minim is that you've got to be in the room to see it. There's no way to monitor your energy usage from outside the house, or even when you go to bed, which makes it somewhat less useful than the Loop from that point of view.
Testing both of these devices was done over a fairly short period of time, and both have the potential to make savings for sure. However, we found the feedback from the Loop was simply better and more compelling than that from the Minim, which is why we've picked it as the more powerful energy saver.
Summary
The Geo Minim is a decent little energy monitor with a familiar format and unobtrusive design. Similar to many of the smart meters we already have in our homes, it's easily understandable and not too complicated to set up.
Programming in your own budget and setting other parameters can take time and could result in less than accurate readings if you get it wrong. However, as a budget friendly device capable of helping you see what you're using in real time, it's pretty good.
You can read more about the Minim in our hands on review here.
On the other hand, the Loop Energy Saver feels like a 'next generation' energy monitor. It's ability to sync seamlessly with desktop and smartphone means your energy consumption is literally in the palm of your hand.
Initial set up was more laborious than with the Minim, but once it was all up and running, the interactivity from the app and website was far more engaging. Valuable insights can be fed back from the device, and overall it was a much more encouraging way to make changes to save energy.
Our favourite between the Loop Energy Saver vs Geo Minim has to be the Loop Energy Saver.
For more advice on saving money by using energy monitors, check out our guide here.


Comments